Creating a moodboard is a great visual tool to collect your thoughts, reflect your vision for a space or even just see how materials interact with each other.
You don’t have to be a professional to put together a moodboard, you just have to give it a go.

- Stunning Materials board by Studio David Thulstrup
1. DEFINE YOUR PURPOSE
There are a few different ways to arrange your thoughts and visualise what you like. Before starting on your moodboard, consider firstly its purpose. Is it purely for inspiration? A collection of images or materials you like? A way to get the creative juices flowing?
Alternatively your moodboard could be room or space specific where you’d like to get a feel for how the room will make you feel and whether the materials and finishes you like will actually work together?
Everyone has their own way to best translate their thoughts into reality and no way is right or wrong, the important thing is to have a go and see for yourself!
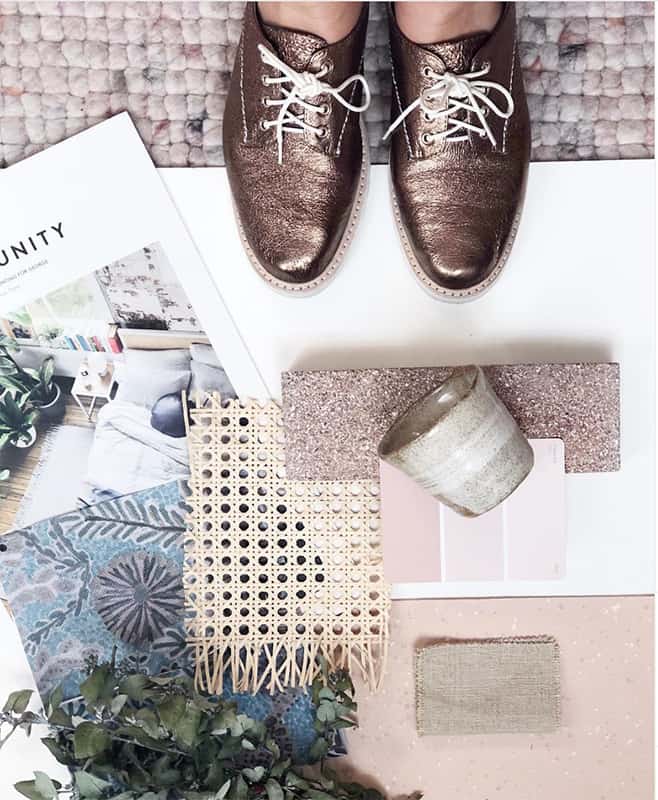
- Super cute physical mood board by our very own BuildHer Tomka Stekovic
2. SELECT YOUR LAYOUT
Whether they be in a digital or physical format, a mood board is a great visual tool, especially helpful when you want to get clarity around an idea or space.
A digital mood board is useful in capturing your inspiration for a space. A collection of images that really reflect the way you want a space to look or feel. It could be a matter of you simply pinning images on a Pinterest board or cutting and pasting images you’ve seen online into a word or powerpoint document. Also, we cannot forget the good old magazine cut out and pasting into a scrapbook here too!
There are a number of platforms to create a digital mood board including Photoshop, Canva, Pages, PowerPoint and Style Source Book. They all provide great visuals, its just a matter of seeing which one works best for you!
A physical mood board is a great way to see how each material and finish interacts with each other. It is as simple as getting some samples together and laying them out on a flat surface. A white background is helpful in this situation so that your eye really casts itself over the materials and finishes themselves with no other distracting surfaces getting in the way.
I personally like and use both forms because I am that person… That person who has upward of 20,000 images on my phone as well as a boot full of samples I’ve collected along the way so it’s really important for me to organise my thoughts both digitally and physically!
LIVING ROOM CONCEPT BY THE STYLING KIND
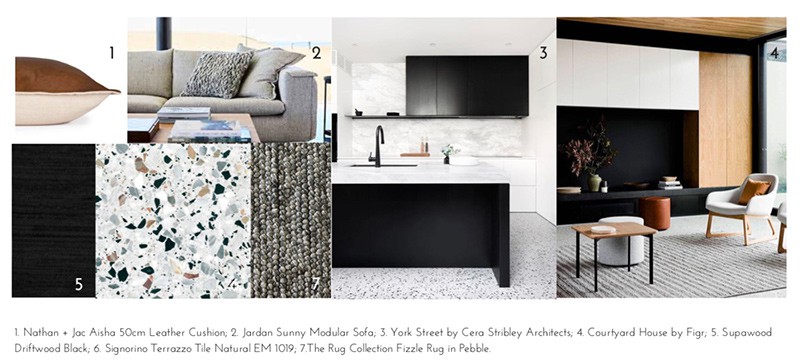
- Moody digital moodboard by Style Guru Melissa
3. EDIT AND REFINE
So you’ve decided on your format, you’ve laid it all out, now it’s time to step back for a few days because chances are you have been living and breathing all things mood board. It’s good to come back to something with fresh eyes.
If you’ve settled on the digital mood board, are you happy with your imagery? Your layout? Was there another image that you couldn’t stop thinking about that now you know you simply have to add in? Do you want a layered, overlapped look or do you want lots of white background?
If you’ve laid out your physical mood board, you might wanna swap out a paint colour sample or timber sample because maybe after a few days to think about it, the other option you were considering actually feels better.
Mood boards are a working progress. They don’t have to be perfect. They are ever-changing and evolving just like a build or renovation is. Just give yourself time to work through your ideas and most of all make sure your mood board gives you all the feels!

- Example of a digital mood board created by Style Gurus Melissa and Rachel for our recent project – Kribashini’s Bathroom
Words by Melissa Bailey and Lisa Kozsik